Move-in evidence kit: 72-hour video & inventory—examples from a Boca condo, a Deerfield townhouse, and a Palm Coast SFH

Moving into a new place is exciting — and stressful. One smart way to protect yourself (tenant or owner) and avoid disputes later is a Move-In Evidence Kit: a short, systematic video walkthrough recorded within the first 72 hours plus a written/photo inventory that documents condition, appliances, fixtures, and any damage. Below I’ll explain the why, the how (step-by-step), and give property-type specific examples for a Boca condo, a Deerfield townhouse, and a Palm Coast single-family home.
Why record a 72-hour video + inventory?
Why Timestamped Video Matters: Capturing What Photos Can’t
When documenting the condition of a rental property, timestamped video has become one of the most reliable forms of move-in and move-out evidence. While still photos are helpful, they often fail to convey the full context that a short, detailed video can provide.
A timestamped video—typically captured on a smartphone within the first 72 hours of move-in—records not just the appearance of each room, but also essential contextual details:
Lighting and visibility: Videos show how natural and artificial light interact in real time, revealing surface flaws or moisture spots that might not appear in static images.
Sound cues: Background noises like running water, appliance hums, or HVAC rattles can document functionality or defects.
Serial numbers and labels: Panning slowly over appliances or systems helps record model numbers and ownership details for later verification.
Working condition: A short clip showing faucets running, burners lighting, or a thermostat adjusting confirms operability in ways a photo cannot.
This richer documentation becomes crucial during disputes about preexisting damage or appliance failures. Timestamp metadata authenticates when the recording occurred, supporting credibility for both tenants and landlords. Many property managers now recommend combining timestamped video with a written inventory checklist for maximum accuracy and protection.
By integrating video into move-in procedures, residents can create a clear, verifiable record of property condition—reducing uncertainty, protecting security deposits, and ensuring smoother turnover.

Itemized Inventories: The Foundation of Fair Move-Out Inspections
An itemized inventory is one of the most effective tools for preventing disputes between landlords and tenants. When combined with photos and short descriptive notes, it provides a transparent, shared record of a property’s condition that both parties can reference at move-out.
The process typically begins at move-in. Each room is reviewed in detail, with every major item—walls, flooring, fixtures, appliances, and furnishings—listed on an inventory form. Alongside each entry, brief notes describe the observed condition (e.g., “small scuff on wall near entry” or “stove burners working, minor discoloration on grates”). Clear, dated photos are attached to each section for visual verification.
Once both tenant and landlord review and sign the completed inventory, it becomes a mutually acknowledged baseline. At move-out, this same document serves as the standard for comparison, helping determine whether changes are due to normal wear and tear or actual damage.
This documentation process builds trust and accountability. Tenants are protected from being charged for preexisting defects, while landlords gain reliable evidence for legitimate deductions. For both sides, a signed and illustrated inventory minimizes ambiguity and supports a fair, efficient resolution process.
Many property management professionals recommend storing digital copies of the signed form and accompanying photos in a shared online folder to ensure easy access at lease-end.
Early Documentation: The Key to Avoiding Deposit Disputes and Strengthening Claims
Documenting property condition at the very start of a tenancy isn’t just a formality—it’s a vital safeguard for both landlords and tenants. Early documentation through move-in checklists, timestamped photos, and detailed inventories provides an objective record that can prevent misunderstandings and support future claims.
For tenants, thorough documentation protects the security deposit. By clearly showing the property’s original condition, renters can prove that any existing wear or defects predated their occupancy. This record becomes especially valuable at move-out, when questions arise about cleaning, repairs, or damages.
For landlords, early documentation ensures a fair and efficient turnover process. It helps substantiate legitimate deductions, deters unfounded complaints, and provides credible evidence in case of disputes. The same records can also be used to support insurance or warranty claims, demonstrating the condition of appliances, systems, and structures before any loss or malfunction occurred.
Industry experts consistently recommend that both parties complete and sign a move-in checklist and inventory within the first few days of occupancy. Attaching photos or videos to the checklist creates a comprehensive, verifiable file that benefits everyone involved.
By taking these proactive steps, landlords and tenants alike can establish transparency, protect their interests, and maintain a smoother, more cooperative rental relationship.
Legal note (Florida): landlords and tenants have rights and duties around inspections and entry; written records and mutually signed move-in checklists help protect both sides. State guidance and legal overviews reinforce documenting the unit condition at or very near move-in.
What to include in your Move-In Evidence Kit
Core pieces (aim to finish within 72 hours of occupancy):
Quick Cover Info for Move-In Videos: What to Include and Why It Matters
When recording a move-in video to document property condition, it’s best practice to begin with a brief “cover shot” that identifies the footage. This opening frame serves as your visual title page, helping ensure the recording can stand on its own as credible evidence in the event of a dispute or claim.
Start your video with these key details:
Property address – State the full street address, including unit or lot number if applicable. This confirms which property the footage represents.
Unit or lot identification – For condos, apartments, or townhouse communities, this distinguishes your space from neighboring units.
Date and time – Show a phone screen or timestamp setting to verify when the recording was made, establishing the footage’s relevance to your move-in date.
Your name(s) – Introduce yourself (and any co-occupants) on camera or state your names audibly. This identifies who made the documentation and connects it to the signed lease or ownership record.
Including this information in the first 10–15 seconds of your video helps organize your documentation and strengthens its validity for landlords, property managers, or insurers. If you later need to reference the video during a move-out inspection, deposit dispute, or damage claim, this simple step ensures there’s no confusion about which unit, date, or party the footage represents.
Pro tip: Keep your introduction concise, then pan slowly through each room, capturing ceilings, floors, and fixtures. End with another brief summary confirming that the recording covers the entire unit on that date.
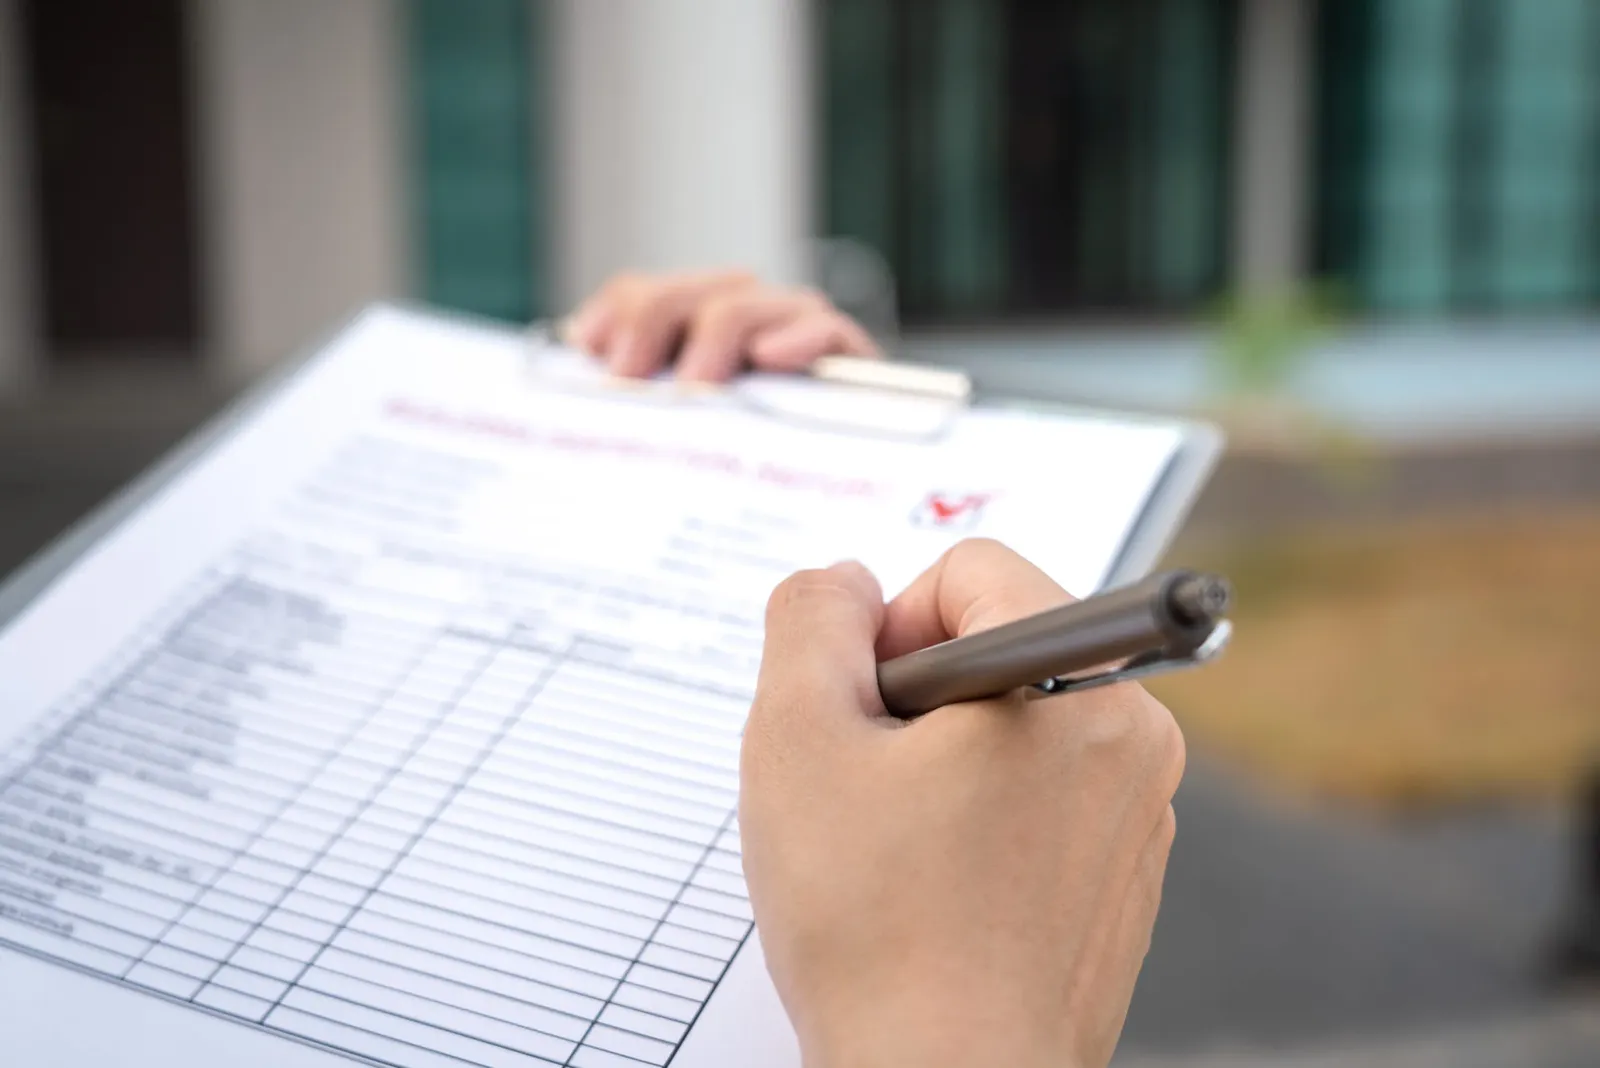
Exterior & Common Access: What to Record During Your Move-In Walkthrough
When documenting your new home’s condition, it’s easy to focus only on the interior — but exterior and shared-access areas can be just as important. These spaces are often governed by the HOA or property management, and early documentation helps clarify maintenance responsibilities, avoid liability, and support any future repair or damage claims.
Here’s what to include in your exterior and common-area checklist or video:
Gate codes and entry systems – Record or note whether the community gate, call box, or key fob system is functional. Mention any issues with access or malfunctioning controls.
Mailbox and key access – Verify the assigned mailbox number and test that your key or code works properly. Document any existing damage, loose hinges, or missing locks.
Parking areas – Capture your assigned space(s) and surrounding pavement or curbing. Look for oil stains, tire marks, or cracks that could later be mistaken as new damage.
Balcony, patio, or lanai condition – Pan slowly to show the flooring, ceiling, railings, and screens. Note any rust, loose bolts, chipped paint, or water stains — these details can be important for HOA or landlord maintenance claims.
Railings and safety features – Test railings and stair edges for sturdiness. Record any wobbling, corrosion, or missing fasteners, since these can pose safety risks and should be reported immediately.
Thorough exterior documentation provides peace of mind for both tenants and property owners. It also ensures that common-area maintenance issues — such as faulty gates or deteriorating railings — are addressed early, reducing potential liability and disputes down the line.
Room-by-Room Sweep: A Step-by-Step Guide to Thorough Move-In Documentation
A room-by-room sweep is one of the most effective ways to document the true condition of a rental property at move-in. By capturing clear visuals and narrating your findings, you create a timestamped record that helps prevent disputes over damage or repairs later.
Here’s how to conduct a complete room-by-room video walkthrough:
Ceilings and walls – Start at the top of each room, slowly panning across ceilings to show paint condition, lighting fixtures, and any signs of water stains or cracks. Move down the walls to document scuffs, holes, or discoloration.
Floors – Capture each flooring type—tile, carpet, or wood—highlighting any chips, stains, or warping. Walk across high-traffic areas to show existing wear patterns.
Outlets and switches – Record close-ups of outlet covers and switches. You can plug in a small device, such as a phone charger, to demonstrate that they function correctly.
Fixtures and built-ins – Open and close doors, cabinets, and drawers to show alignment and hardware condition. Document ceiling fans, light fixtures, or shelving to confirm they’re intact and operational.
Windows and screens – Film each window from the inside, showing that it opens and closes smoothly. Check locks, windowpanes, and screen mesh for any cracks or tears.
Locks and doors – Show that door locks work and keys fit properly. Record any signs of rust, misalignment, or sticking that could affect security or access.
Narrate major findings as you go. For instance, say:
“Bedroom 1 — paint scuff near closet door, ceiling fan working normally.”
“Bathroom — floor tile chipped near sink, window latch loose.”
Your spoken notes provide context and make it easier to match visuals with specific rooms or maintenance concerns later.
This simple, systematic approach protects both tenants and landlords by creating a clear, credible record of property condition — minimizing misunderstandings at move-out.
Appliances & Systems: How to Document Functionality and Condition During Move-In
When conducting a move-in inspection, appliances and home systems deserve close attention — they represent some of the most valuable (and commonly disputed) items in a rental property. Capturing detailed evidence of their condition helps establish accountability for both landlords and tenants.
Here’s what to include in your appliance and system documentation:
Model and serial numbers – Record close-up footage of each label, including brand, model, and serial number. This helps verify warranty coverage and confirms exactly which units were present when you moved in.
Apparent condition – Take wide shots of each appliance (refrigerator, range, dishwasher, washer/dryer, etc.) and note any scratches, dents, or missing knobs. For built-in systems like HVAC or water heaters, check visible surfaces for rust or leaks.
Operational check – Power each appliance on briefly to confirm it runs. Capture the indicator lights, display screens, or sounds of operation. Mention aloud if something doesn’t respond, leaks, or vibrates excessively.
HVAC and thermostat – Show the thermostat screen clearly, recording the current indoor temperature and system mode (cooling or heating). Note whether the system responds when adjusted.
Hot water verification – Turn on a hot water tap and show steam or thermometer reading to prove that the water heater is functional and set to a safe temperature.
Electrical breakers – If a major system fails to power on, record a quick view of the breaker panel. Check that circuits are labeled and note any tripped switches or missing covers.
By documenting both appearance and performance, you create a reliable reference for repairs, warranty claims, and security deposit protection. It also helps landlords confirm that essential systems were working properly at the start of your lease, avoiding confusion if issues arise later.
Safety & Small Items: Essential Move-In Documentation
When moving into a new rental, it’s easy to focus on large fixtures and appliances, but safety features and small items are just as important to document. Recording these details at move-in helps protect tenants, ensures compliance with safety regulations, and provides evidence in case of missing items or disputes.
Here’s what to include during your move-in walkthrough:
Smoke and carbon monoxide detectors – Test each unit to confirm it is operational. Record the device, its location, and any expiration or manufacturing dates visible on the label. Mention if batteries are installed and functioning.
Security cameras – Note whether the property includes indoor or outdoor cameras. Record their placement, condition, and functionality. Check whether feeds are live or if the owner provides access instructions.
Door peepholes and locks – Show that peepholes are intact and provide a clear view. Test locks, deadbolts, and latches on doors, including sliding or patio doors, to verify proper operation.
Included keys, remotes, and fobs – Record all keys, garage remotes, and electronic access devices provided by the landlord. Note the quantity, type, and any pre-existing damage or wear.
Narrating these items aloud while filming provides clarity and ensures that nothing is overlooked. For example:
“Front door — peephole clear, deadbolt functioning, two keys provided; garage remote works.”
By documenting safety devices and small but essential items, tenants create a complete record that can prevent disputes and ensure all required safety features are accounted for.
Creating an Effective Move-In Inventory List
A detailed inventory list is a critical tool for documenting the condition of a rental property at move-in. It protects both tenants and landlords by providing a clear record of what was included with the unit and any pre-existing wear or damage.
Here’s how to create a comprehensive inventory list:
Number each item – Assign a unique number to every item you document, including furniture, appliances, light fixtures, blinds, rugs, and other included features. This creates an organized reference that’s easy to track.
Take photos – Photograph each item from multiple angles. Close-ups help highlight existing scratches, dents, or stains, while wider shots show placement and overall condition.
Add a short note – Include a concise description of the item and any notable imperfections. For example:
“1 — kitchen island: scratch 4 in. left side”
“2 — living room sofa: minor fabric pull near right arm”
“3 — bedroom blinds: fully functional, slight discoloration on bottom slat”
Combine notes with visuals – Pair each photo with its corresponding note in a document or spreadsheet. This ensures that anyone reviewing the inventory can quickly match the description to the image.
A numbered, photo-backed inventory list makes move-out comparisons straightforward and minimizes disputes over deposits or damages. By documenting condition meticulously at move-in, both parties have a clear, mutually agreed-upon record to reference throughout the lease.

Signatures: Securing Your Move-In Documentation
A signed move-in checklist is one of the most important pieces of documentation for both tenants and landlords. It serves as a formal acknowledgment of the property’s condition at the start of the lease, helping prevent disputes over damages, repairs, or missing items when the tenancy ends.
Here’s how to ensure your move-in checklist is properly documented:
Use a standardized template – Many major rental resources, including Zillow, provide move-in checklist templates. These formats are designed to cover key areas such as room condition, appliances, fixtures, and safety features.
Complete the checklist thoroughly – Include all rooms, major systems, appliances, and common areas. Add notes for any pre-existing damage, cosmetic issues, or missing items.
Capture signatures – Both tenant(s) and landlord or property manager should sign the checklist if possible. Signatures can be on a printed PDF or a high-quality photo of the completed form. This establishes mutual agreement on the property’s condition.
Retain copies – Keep digital copies and physical backups. A PDF stored in cloud storage or emailed to both parties ensures easy access in case of disputes or insurance claims.
Optional: timestamped video accompaniment – Pairing the signed checklist with a brief video walkthrough reinforces the documentation, showing that both parties observed and agreed on the property’s condition.
Having a signed checklist provides legal and practical protection for tenants and landlords alike. It creates a clear record that all parties agreed to, minimizing misunderstandings and supporting any claims related to property condition during or after the lease.
How to record the 72-hour video (practical workflow)
Using Your Phone to Record Move-In Condition: Tips for Accurate Timestamping
Recording your move-in condition with a smartphone is an efficient and reliable way to document a rental property. For the record to be credible, it’s important to capture accurate date, time, and location information — all of which smartphones can provide automatically when configured correctly.
Follow these best practices for using your phone:
Enable timestamp and location services – Use your phone’s built-in camera rather than a third-party app. Ensure location services are turned on so the file’s metadata automatically records the date, time, and GPS coordinates. This adds authenticity and supports your documentation if questions arise later.
Start with a spoken introduction – At the beginning of your video, state your name, the property address, and the current date and time. For example:
“This is [Name], at [Address], recording move-in condition on [Date/Time].”This audible introduction supplements the digital metadata and clearly identifies who recorded the footage and when.
Keep the introduction brief but clear – 10–15 seconds is sufficient. Then move on to systematically film each room, appliance, fixture, and common area.
Check lighting and stability – Good lighting ensures details are visible. Keep the phone steady or use a tripod for smoother footage. Pan slowly across walls, floors, ceilings, and appliances to capture a comprehensive record.
Backup the video – Save a copy to cloud storage or an external drive immediately. Digital backups protect against accidental deletion and make it easy to share with landlords, property managers, or insurers.
By enabling timestamps and narrating a clear introduction, you create a verifiable, organized record of your move-in condition. This simple practice can prevent disputes over damage, repairs, or missing items at the end of the lease.
Move-In Video Walkthrough: Slow, Methodical Panning for Accurate Documentation
A carefully recorded move-in video is one of the most effective ways to document property condition and protect your security deposit. The key is a slow, methodical walkthrough that captures every area, defect, and appliance clearly.
Follow this recommended sequence and technique:
Planned route – Begin at the entryway, then move through the living room, kitchen, bedrooms, bathrooms, closets, balcony or garage, and finally the exterior. Following a logical sequence ensures that no areas are overlooked and makes the video easier to review later.
Walk slowly – Move at a measured pace, allowing viewers to absorb each space. Rushing can result in missed details or blurry footage.
Pan methodically – Use smooth, horizontal or vertical pans rather than jerky movements. Cover walls, ceilings, and floors thoroughly.
Pause on defects – Stop at any scratches, dents, stains, or other imperfections. Zoom in or move closer to provide a clear view of the issue. Narrate briefly to describe the defect and its location (e.g., “Kitchen cabinet — scratch on bottom left panel”).
Capture serial and model numbers – Record close-ups of appliances, HVAC units, and other equipment. Clearly show serial numbers, model information, and any labels for reference in future maintenance, warranty, or insurance claims.
By following this methodical approach, your move-in video becomes a comprehensive, organized record that is easy to reference, supports damage claims, and reduces potential disputes with landlords or property managers.
Clear Narration: How to Speak Objectively During a Move-In Walkthrough
When recording a move-in video, what you say matters as much as what you show. Clear, objective narration ensures that anyone reviewing the footage — landlords, property managers, or insurers — understands the exact condition of the property without ambiguity.
Tips for effective narration:
Describe what you see, don’t speculate – Focus on observable facts rather than assumptions about causes or responsibility. For example:
“Kitchen sink drains slowly; water pressure low; small crack at bottom of cabinet door near hinge.” Avoid statements like “The sink must be broken” or “Someone damaged this,” as speculation can weaken the credibility of your record.
Be concise and specific – Name the item or location and note the defect or condition in simple terms. Include measurements or approximate size when relevant.
Follow the video sequence – Narrate as you pan through each room systematically (entry → living room → kitchen → bedrooms → bathrooms → closets → balcony/garage → exterior). Pausing at each defect helps capture clear images and matches your description to the visual.
Mention operational status – If testing appliances or systems, narrate what happens:
“Dishwasher powers on, but water does not fill completely.”
Keep a neutral tone – Objective, calm narration increases the credibility of the documentation and avoids bias.
By narrating clearly and factually, your move-in video becomes a trustworthy record that accurately reflects the property’s condition, protecting both tenants and landlords from future disputes.
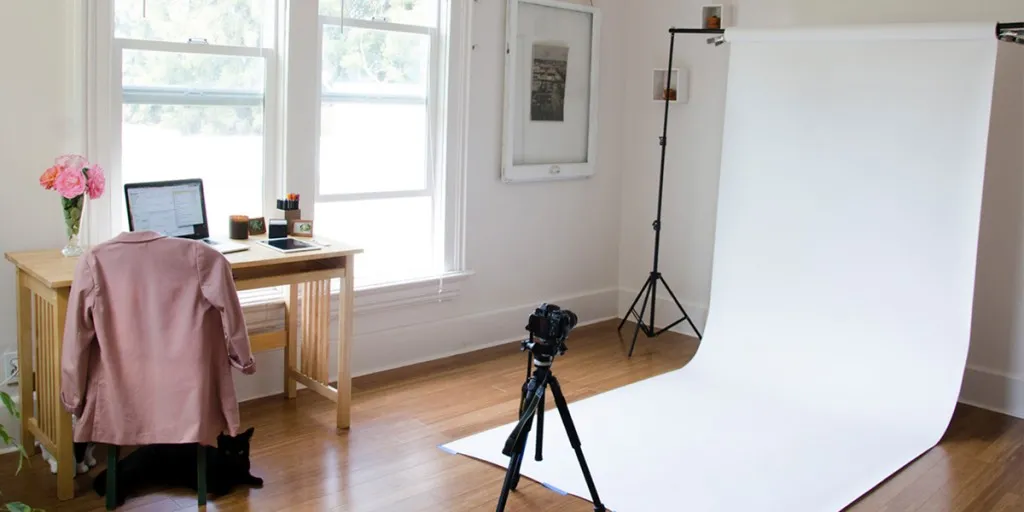
Photographing Items for Accurate Measurement During Move-In
When documenting a rental property at move-in, some items may require precise measurement to track size, damage, or alignment. Photos with a scale reference make it easier to assess these details later and reduce disputes over condition or repairs.
Best practices for measuring and photographing items:
Stop at each item needing measurement – Any scratches, dents, holes, or irregularities that might need repair or replacement should be photographed carefully.
Include a scale reference – Place a ruler, measuring tape, or a common coin next to the item. This provides a clear size reference so viewers can understand the dimensions without guessing.
Take multiple angles – Capture the item from straight-on and slightly angled perspectives to show depth, context, and surrounding surfaces.
Include a note – Pair the photo with a short description:
“Baseboard dent near living room corner; approximately 3 in. long.”
This ensures that the measurement and location are clearly documented.
Organize photos systematically – Number or label each photo to match your move-in checklist or inventory. This keeps records clear and easy to reference in case of repairs, disputes, or insurance claims.
By photographing items with a clear scale, tenants create an accurate, objective record of property condition that protects both themselves and the landlord throughout the lease.
Secure Your Move-In Documentation: Cloud and Local Backup
Once you’ve recorded your move-in walkthrough, completed your checklist, and photographed all items, backing up your documentation immediately is critical. Relying on a single device can be risky — phones can fail, files can be accidentally deleted, and storage cards can become corrupted.
Best practices for secure storage:
Upload to cloud storage – Services like Google Drive, iCloud, or Dropbox provide secure, accessible storage. Cloud backup ensures your videos, photos, and PDFs are protected even if your device is lost or damaged.
Keep a local copy – In addition to cloud storage, maintain a copy on your computer, external hard drive, or USB drive. This gives you quick access without relying on an internet connection.
Organize files clearly – Label folders and files by property address, date, and type of documentation (e.g., “Kitchen Appliances 2025-10-28”). Clear organization makes it easier to reference information in the future.
Verify uploads – After uploading to the cloud, double-check that files are complete, playable, and accurately dated. This step avoids surprises if you need to present evidence later.
Share with necessary parties – Consider sharing access with the landlord or property manager, especially signed checklists, so both parties have an official copy.
By keeping both cloud and local copies, you protect yourself from data loss and ensure that your move-in documentation remains reliable and accessible throughout the lease term.
Creating a One-Page PDF Summary of Your Move-In Documentation
After completing a detailed move-in walkthrough, photographing the unit, and compiling your inventory, it’s helpful to convert key information into a concise, one-page PDF summary. This summary is ideal for signatures and ensures both tenants and landlords have a clear, agreed-upon record of the property’s condition.
Steps to create an effective PDF summary:
Select key visuals and notes – Include the most important photos from your walkthrough, focusing on major appliances, defects, and pre-existing damage. Pair each image with a short descriptive note.
Include your inventory list – Numbered items with brief descriptions (e.g., “1 — kitchen island: scratch 4 in. left side”) should be summarized on the page. This provides a quick reference for both parties.
Keep it concise – Limit the summary to one page if possible. Highlight critical findings without overwhelming the reader with excessive detail. The full video and complete inventory can be referenced if needed.
Add signature lines – Include fields for both the tenant and landlord/property manager to sign and date. This formalizes agreement on the move-in condition.
Submit promptly – Many landlord or tenant templates request that the move-in checklist be completed and signed within 24–72 hours of occupancy. Timely submission ensures compliance with lease requirements and preserves your documentation in case of disputes.
Use accessible tools – PDF creation can be done using built-in features on smartphones or computers, or through apps like Adobe Acrobat, Canva, or online document converters.
A one-page PDF summary streamlines the move-in process, creates a professional record, and makes it easy for both parties to agree on property condition in writing.
Examples — what to focus on by property type
Boca Condo Move-In Walkthrough: What to Document in a High-Rise or Amenity Building
When moving into a Boca Raton condominium, especially in a high-rise or amenity-rich building, your move-in documentation should go beyond the unit’s interior. Condos have shared systems, HOA-maintained features, and specific move-in procedures that all require careful attention. Proper documentation helps protect you from misunderstandings about maintenance responsibilities or damage claims later.
Key areas to document during your Boca condo walkthrough:
Balcony or lanai finish – Record the tile or concrete surface, railing, and any visible cracks or stains. In beachfront or coastal properties, look for early signs of corrosion, water intrusion, or chipped coatings that could indicate wear from salt exposure.
Sliding door tracks and locks – Open and close each sliding door to confirm smooth operation and secure locking. Film the track condition and weather seals, noting any dirt buildup or corrosion that might impede function.
Window seals and caulking – Check windows for air or water leaks. Document any cloudy panes, deteriorated seals, or frame corrosion that could require HOA or owner attention.
HOA-provided items – Note whether the unit includes association-provided items such as parking decals, key fobs, access cards, or mailbox keys. Keep photos or scans of any issued materials and receipts.
Common areas and building systems – Photograph and note the condition of hallways, elevators, lobbies, pools, gyms, and garage areas. These are often HOA-maintained, but documentation is useful if shared systems affect your unit (for example, elevator scuffs or garage leaks).
Water stains and ceilings – Pay special attention to any water stains on ceilings or near vertical stacks, which may indicate roof or plumbing issues shared among units.
Hurricane protection – If shutters, impact glass, or panels are required or provided, record their condition and note whether all pieces are present and functional.
HOA documentation – Keep digital and paper copies of HOA move-in rules, contractor or gate/operator receipts, and any move-in/out inspection forms required by the association.
Because condos divide maintenance duties between the unit owner and the association, it’s important to clarify which issues fall under each party’s responsibility. A clear, timestamped video and written checklist can prevent confusion later — especially for repairs related to shared plumbing stacks, roofs, or exteriors.

Deerfield Townhouse Move-In Walkthrough: Key Areas to Document
Moving into a Deerfield Beach townhouse, typically a row or attached unit with a small yard, requires careful documentation of both interior and exterior features. Townhouses share walls, yards, and amenities, so clear records help protect tenants and owners from disputes about maintenance, noise, or damage responsibilities.
Key areas to document during a townhouse move-in walkthrough:
Exterior fences and gates – Photograph fences, gates, and locks, noting any scratches, rot, or misalignment. Clarify boundaries and who is responsible for maintenance — the HOA, landlord, or neighbor — especially in shared yard areas.
Patio and porch – Capture the condition of flooring, railings, steps, and overhead structures. Pay attention to any signs of water pooling or damage.
Drainage near the foundation – Check for standing water, erosion, or soil buildup near the home’s foundation. Early documentation of drainage issues can prevent future disputes or property damage claims.
Screens and sliding doors – Test windows and sliding doors for smooth operation and security. Record any tears, broken latches, or misaligned tracks.
Garage door operation – Verify that the garage door opens and closes smoothly, and that any remotes or keypads are functional. Note scratches or dents on the door panels.
Shared wall noise points – Make notes about potential sound transmission areas between units, such as adjoining walls, floors, or ceilings. While subjective, recording observations can be useful if noise complaints arise later.
Signs of dampness or water intrusion – Inspect behind exterior siding, under porch steps, and near drainage areas for dampness, mold, or rot. Capture photos or video to document any pre-existing conditions.
Shared amenities – Record operation of HOA-controlled features, such as pool access, clubhouses, or community gates. Note who issued keys or remotes, and retain receipts or instructions.
Because townhouses blend private and shared elements, it’s essential to clearly record both unit-specific and community-maintained features. A methodical, timestamped video walkthrough combined with written notes provides a solid record to avoid disputes regarding damage, maintenance responsibilities, or shared-use amenities.
Palm Coast Single-Family Home Move-In Checklist: Yard, Driveway & Systems
When moving into a single-family home in Palm Coast, Florida, it's essential to document both the interior and exterior conditions thoroughly. This not only protects your security deposit but also ensures you're aware of your responsibilities regarding property maintenance. Here's a comprehensive guide to help you navigate the move-in process:
Landscaping & Irrigation
Irrigation System: Ensure the system is set up efficiently to conserve water. Palm Coast requires licensed contractors for irrigation system installations or alterations.
Watering Restrictions: Palm Coast enforces watering restrictions to promote water conservation. Irrigation is limited to no more than one hour per irrigation zone per irrigation day and is prohibited between 10 a.m. and 4 p.m. Residential irrigation is allowed on specific days based on your address:
Odd-numbered or no addresses: Wednesday and Saturday
Even-numbered addresses: Thursday and Sunday
Non-residential irrigation: Tuesday and Friday
Driveway & Exterior Features
Driveway Condition: Check for cracks, stains, or uneven surfaces.
Soffits & Gutters: Inspect for damage or blockages that could lead to water damage.
Satellite Dishes: Note the presence and condition of any satellite dishes.
Pool & Equipment (If Present)
Pool Condition: Document the cleanliness and functionality of the pool.
Equipment Functionality: Ensure all pool equipment is operational and note any issues.
Septic vs. City Sewer
Determine Your System: Check your water bill; if you pay a monthly sewer fee, you're likely on a city sewer system.
Septic System Maintenance: If on a septic system, regular pumping and maintenance are essential.
Utility Shutoff Locations
Water Shutoff Valve: Locate the main water shutoff valve and document its location.
Breaker Panel: Ensure the breaker panel is accessible and note any labeled circuits.
Community Access & HOA Rules
Gate Codes: Record any community gate codes for easy access.
HOA Move-In Rules: Obtain and review any HOA move-in guidelines to ensure compliance.
Documentation Tips
Photograph Everything: Take clear photos of all areas mentioned above.
Create a Checklist: Organize your findings into a checklist for easy reference.
Store Copies: Keep digital and physical copies of all documents and photos.
Sample Brief Move-In Video Script: 30–90 Seconds per Major Area
Recording a concise, factual move-in video is one of the most effective ways to document the condition of a rental property. A brief script ensures you capture all major areas while keeping the footage organized, clear, and easy to reference later.
Example Script (30–90 seconds per area):
“Hi — [Name], [Address]. Entering through front door: floor tile — two 1-inch scratches by threshold.
Living room: paint scuff on northeast wall, outlet by TV works (tested).
Kitchen: fridge model [xxxx], serial [xxxx], door scratch near handle, sink drains slowly.
Master bath: tile crack at tub rim.
Lanai: sliding door lock functions, screen has 3-inch tear at bottom right.
Saving to cloud now — PDF inventory will follow.”
Tips for Using This Script:
Keep each area short and factual – Focus on observable details and operational checks. Avoid speculation about causes or responsibility.
Longer narration for complex defects – If a room or system has multiple issues, describe them clearly but still in a concise, systematic way. For example, note multiple scratches, leaks, or appliance issues individually.
Follow a logical sequence – Start at the entry and move through living areas, kitchen, bedrooms, bathrooms, closets, outdoor spaces, and any shared or exterior features.
Pair with written inventory – A PDF inventory or checklist complements the video, providing additional notes, item numbers, and space for signatures.
Save and back up immediately – Upload video to cloud storage while retaining a local copy to prevent data loss and maintain an accurate timestamped record.
Using a short, structured script like this ensures your move-in video is clear, credible, and organized, helping protect your interests and simplify move-out inspections.
Move-In Documentation Deliverables: How to Store and Share Effectively
Properly storing and sharing move-in documentation ensures that both tenants and landlords have a clear, verifiable record of property condition. Organized deliverables can prevent disputes, support insurance or warranty claims, and streamline communication with property managers or HOA representatives.
Recommended Deliverables:
Cloud folder contents – Create a dedicated cloud folder (Google Drive, Dropbox, iCloud, etc.) containing:
Full video file(s) – Complete walkthrough footage of all rooms, exterior areas, and appliances.
Numbered photos – High-quality images of defects, appliances, and key features, paired with inventory numbers.
Signed PDF inventory – One-page or full checklist documenting pre-existing conditions, with tenant and landlord/manager signatures if possible.
Short summary email – A brief message to the landlord or HOA that links to the cloud folder and summarizes key findings.
Preserve original files – Avoid over-compressing videos or photos. Metadata (date, time, GPS coordinates) is critical for verifying when and where the documentation was captured.
Request acknowledgment – If the landlord or manager is present at move-in, ask them to sign the inventory and email it back. If they decline, send the summary email with links to all files and invite written acknowledgment. This ensures mutual understanding of the property’s condition even without an in-person signature.
Organizing move-in documentation in this structured way creates a clear, reliable record that benefits tenants, landlords, and HOAs alike, reducing potential conflicts and ensuring all parties have access to the same information.
Source: Zillow Rental Resource Center — “Move-In Checklist: Storing and Sharing Documentation Securely”
Quick checklist (printable)
Intro video with spoken date/time/name
Exterior & access documented
All rooms swept, major defects captured + zooms
Appliances — model/serial filmed
Safety devices tested (smoke/CO)
Inventory list with photos (numbered)
Upload to cloud & send link to landlord/manager
Signed copy stored
Sources:
Florida Department of Agriculture and Consumer Services, Landlord/Tenant Guidelines (www.fdacs.gov)
U.S. Department of Housing and Urban Development (HUD), Renter’s Checklist and Inspection Tips — www.hud.gov
Zillow Rental Management, Move-In Checklist and Security Deposit Best Practices — www.zillow.com
Zillow Rental Resource Center — “Best Practices for Move-In and Move-Out Inspections”
Zillow Rental Resource Center — “Move-In Inspection Checklist: Documenting Property Condition Inside and Out”
Zillow Rental Resource Center — “Move-In Inspection: Testing Appliances and Home Systems”
Zillow Rental Resource Center — “Move-In Walkthrough Tips: How to Document Your Rental Property Condition”
Zillow Rental Resource Center — “Move-In Checklist: Ensuring Safety and Security Features Are Documented”
Zillow Rental Resource Center — “Move-In Checklist: Creating an Inventory of Furnishings and Fixtures”
Zillow Rental Resource Center — “Move-In Checklist: Documenting Property Condition and Securing Signatures”
Zillow Rental Resource Center — “Move-In Documentation: Using Smartphones for Reliable Records”
Zillow Rental Resource Center — “Move-In Walkthrough Best Practices: Documenting Every Room and System”
Zillow Rental Resource Center — “Move-In Walkthrough: Tips for Effective Video Documentation”
Zillow Rental Resource Center — “Move-In Inspection Tips: Documenting Size and Condition Accurately”
Zillow Rental Resource Center — “Move-In Documentation: Backing Up Photos, Videos, and Checklists”
Zillow Rental Resource Center — “Move-In Checklist: Summarizing and Signing Your Documentation”
Zillow Rental Resource Center — “Condo Move-In Walkthrough: Documenting HOA and Unit Responsibilities in High-Rise Buildings”
Zillow Rental Resource Center — “Townhouse Move-In Checklist: Documenting Boundaries, Shared Systems, and Exterior Condition”
Zillow Rental Resource Center — “Move-In Video Tips: Creating a Concise and Accurate Walkthrough”
Zillow — Rental Move-In and Move-Out Checklist (template & guidance). Zillow
Redfin — Move-In Checklist guidance and room-by-room templates. Redfin
Florida Statutes — landlord/tenant provisions concerning inspections and entry. Online Sunshine
The Florida Bar — consumer tips on rights and duties of tenants/landlords (inspection notices, entry, etc.). Florida Bar
Move-in tips for Palm Coast new residents (utilities, local steps to settle in). searchpalmcoastproperties.com